Family's Favorite Baked French Toast Sticks: The Ultimate Make-Ahead Brunch Solution
Imagine waking up to the irresistible aroma of cinnamon and vanilla, knowing that a plate of golden, crispy, and utterly delicious French toast is just minutes away. No frantic cooking, no messy stovetop frying – just pure, brunch-time bliss. This dream becomes a reality with our recipe for Family's Favorite Baked French Toast Sticks. Perfect for leisurely weekends, holiday gatherings, or any morning when you crave something special without the fuss, these make-ahead beauties are about to become your new brunch staple.
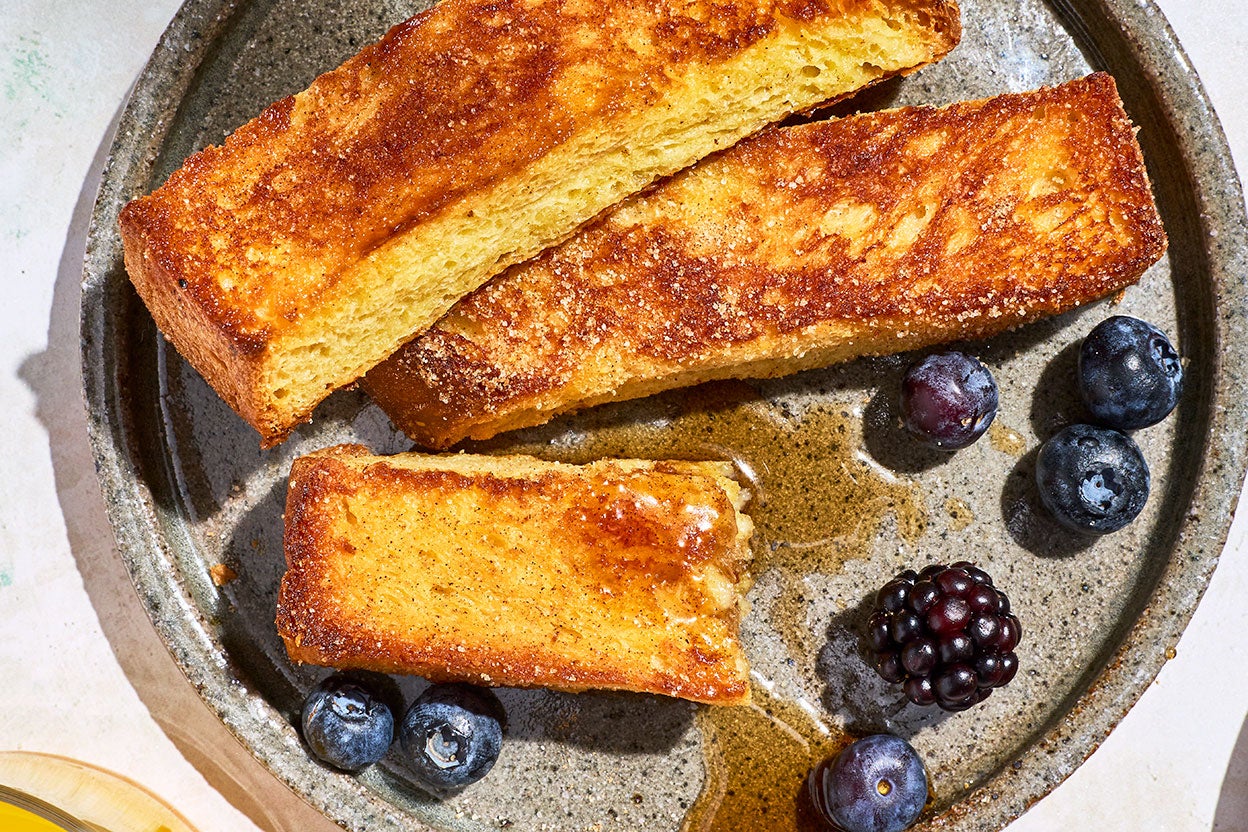
Forget the often-soggy versions that leave you wishing for more. Our baked French toast sticks boast a beautifully golden, crunchy exterior that gives way to a soft, fluffy interior, making them utterly perfect for dipping. And because they're baked in the oven, you achieve that coveted crispiness with minimal effort and significantly less oil than traditional pan-fried methods. It’s a win-win: a delightful breakfast that caters to both comfort and convenience, transforming your morning routine into a relaxed culinary experience.
Why Baked French Toast Sticks Are a Game-Changer for Brunch
The magic of these homemade french toast sticks lies in their simplicity and superior texture, largely thanks to the baking method. When you bake French toast, you bypass the challenges of achieving even browning and consistent crispiness often associated with frying. Instead, a hot oven envelops each stick, slowly transforming the eggy batter into a golden crust that snaps with every bite, while keeping the inside wonderfully tender.
This hands-off approach also means less grease and a lighter feel, allowing the vibrant flavors of cinnamon, nutmeg, and vanilla to truly shine. Each bite is a harmonious blend of sweetness and spice, creating a satisfying breakfast that tastes far more decadent than its preparation suggests. Beyond the fantastic flavor and texture, the practicality is undeniable. They're effortlessly Crispy Oven-Baked French Toast Sticks: Easy Breakfast Recipe for feeding a crowd, as you can arrange multiple batches on baking sheets, allowing everyone to enjoy warm, fresh sticks simultaneously. For families, the hand-held format makes them an instant hit, especially when paired with a little bowl of syrup for dunking – a surefire way to make breakfast fun and interactive for even the pickiest eaters.
Mastering the Art of Make-Ahead: Prep for Perfection
One of the standout features of these french toast sticks is their incredible make-ahead potential, making them the ideal choice for a relaxed brunch. The secret to a stress-free morning lies in thoughtful preparation the night before. Here’s how to set yourself up for success:
Choosing the Right Bread: The Foundation of Fluffy Sticks
The type of bread you use is paramount to avoiding soggy French toast. Thin, flimsy sandwich bread simply won't do; it absorbs too much batter too quickly and collapses under the heat. Instead, opt for a thick-cut bread, ideally 1 to 1½ inches thick. Excellent choices include:
- Texas Toast: Already perfectly sliced and thick.
- Brioche or Challah: These rich, slightly sweet breads offer an incredibly soft interior and a beautiful golden crust.
- Day-old Artisan Bread: A slightly stale loaf (think sourdough, challah, or even a robust white bread) works wonderfully because it’s firmer and won't disintegrate when dipped, absorbing the perfect amount of batter without becoming mushy.
Once you have your bread, slice it into uniform sticks. The consistent thickness ensures even cooking and that satisfying crispness.
Crafting the Ideal Batter: Flavor and Consistency
The batter is the heart of your French toast, infusing flavor and creating that golden crust. While the process is simple, a few tips can elevate your results:
- Eggs: Use large eggs for the best consistency. If you only have smaller ones, adjust the quantity (four to five small/medium eggs for every three large).
- Milk: Any milk works, but the fat content influences the richness. 2% milk is standard, but whole milk or heavy cream will yield a thicker, creamier batter. For dairy-free options, almond or oat milk can be substituted, though the final texture may be slightly less creamy.
- Flavor Powerhouses: Don’t skimp on vanilla extract! It’s crucial for that classic French toast taste. A generous scattering of ground cinnamon and a pinch of nutmeg add warmth and depth. A tiny bit of salt helps balance the sweetness.
- Sweetness Control: Sprinkle some granulated sugar into the batter, and if you like a sweeter finish, dust a little more over the sticks before baking. This extra sugar caramelizes in the oven, adding to the golden crunch.
The Make-Ahead Trick: Whisk together all your batter ingredients the night before and store it in an airtight container in the refrigerator. Slice your bread into sticks and place them back in their bag or an airtight container to keep them from drying out. In the morning, simply give the batter a quick whisk, dip your bread, and proceed to baking. It’s that easy!
Baking Your Way to Crispy, Fluffy Bites
Once your bread is sliced and your batter is prepped, the baking process is straightforward. Achieving perfect Get Perfect French Toast Sticks: Tips for Crispy, Fluffy Bites is all about technique.
- Preheat Your Oven: A hot oven (typically 375-400°F) is essential for crisping up the sticks quickly and evenly.
- Prepare Your Pan: Line a baking sheet with parchment paper for easy cleanup and to prevent sticking. A light coating of cooking spray or melted butter on the parchment can further enhance crispiness.
- Dip and Drain: Briefly dip each bread stick into the batter, ensuring it’s fully coated but not oversaturated. Lift and let any excess batter drip off. Over-soaking will lead to soggy French toast.
- Arrange and Bake: Place the dipped sticks in a single layer on the prepared baking sheet, ensuring there's a little space between each one for air circulation. This helps them crisp up rather than steam. Bake for about 10-15 minutes, then flip them over and bake for another 5-10 minutes, or until they are golden brown and firm to the touch.
The beauty of baking in batches is that while one tray of delicious french toast sticks is being devoured, another can be in the oven, ready for the next round of hungry guests. This flexibility is what truly makes them ideal for a relaxed brunch with varying arrival times.
Serving Suggestions and Creative Dipping Adventures
While these baked French toast sticks are incredible on their own, the real fun begins with the dipping options. Of course, warm maple syrup is a classic for a reason – its rich, sweet notes perfectly complement the cinnamon-spiced toast. But don't stop there! Consider these delightful additions:
- Powdered Sugar: A simple dusting adds an elegant finish and a touch more sweetness.
- Fresh Berries: A vibrant pop of color and natural sweetness from strawberries, blueberries, or raspberries.
- Whipped Cream: A dollop of fluffy whipped cream makes for an indulgent treat.
- Fruit Preserves: A small bowl of your favorite jam or fruit compote offers a burst of fruity flavor.
- Nutella or Chocolate Sauce: For the ultimate sweet tooth, these rich dips are always a hit.
- Yogurt Dip: Mix Greek yogurt with a touch of honey and vanilla for a lighter, tangy option.
Whether you're hosting a grand brunch or simply treating your family to a special morning meal, these homemade baked french toast sticks offer versatility, convenience, and undeniable deliciousness. They are truly a family favorite, sure to be requested again and again.
